How to Allocate Supplies to Products
Here are a couple of ways to link your inventory items to your customer-facing catalog.
Method 1: Link supplies directly to an attribute.
-
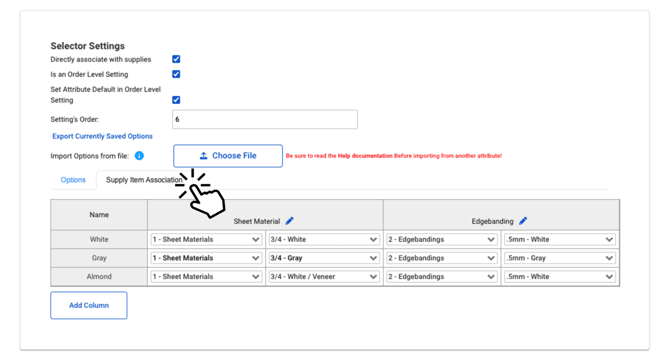
To link supplies directly to an attribute, navigate to the select-style attribute that you want to edit.
-
Ensure the "Directly associate with supplies" setting is checked on the attribute.
-
Select the Supply Item Association tab on the option table.
-
Label the Association (ie Sheet Material)
-
Select the Location (1- Sheet Materials in the image below) and Inventory Item (3/4 - White) you want to associate.
-
You can add up to 10 linked supplies per option!
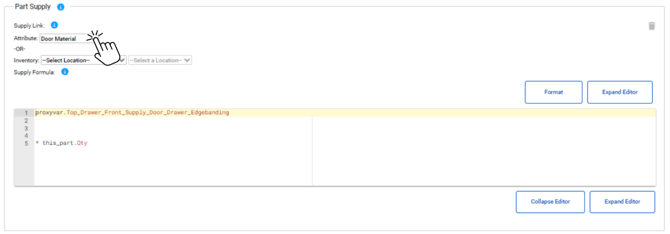
- Once you've linked your supply item to an attribute, you can go into the Parts section of a product, open a particular part, and add a new Part Supply. Select the Attribute from the dropdown, and write a formula to tell you how much of that supply to allocate.
If you need to associate more than 10 inventory items to an attribute, contact our implementation engineers via your customer success manager or support@allmoxy.com!


If you cannot link a supply through an attribute, then in the Part Supply, select the Inventory option and choose your specific supply based on the Supply Location and Supply Name. Follow Method 2 below for more information!
Method 2: Link supplies to a part of a product.
Review our Inventory Reports; especially the Allocated Supplies and Supplies in Use reports, to view inventory at every stage of production!
