
Attributes are attached, ordered and grouped on the product's Attributes tab. Add them with Add Group Attribute or Add Item Attribute, drag them into order, and use Add Group Category or Add Item Category to put related attributes under a heading customers can collapse.
Applies to: every shop with its own catalog. You need the Manage Catalog permission.
In this article
- Attach an attribute
- Put attributes in order
- Group attributes under a heading
- Remove an attribute from a product
- Things to know
Attach an attribute
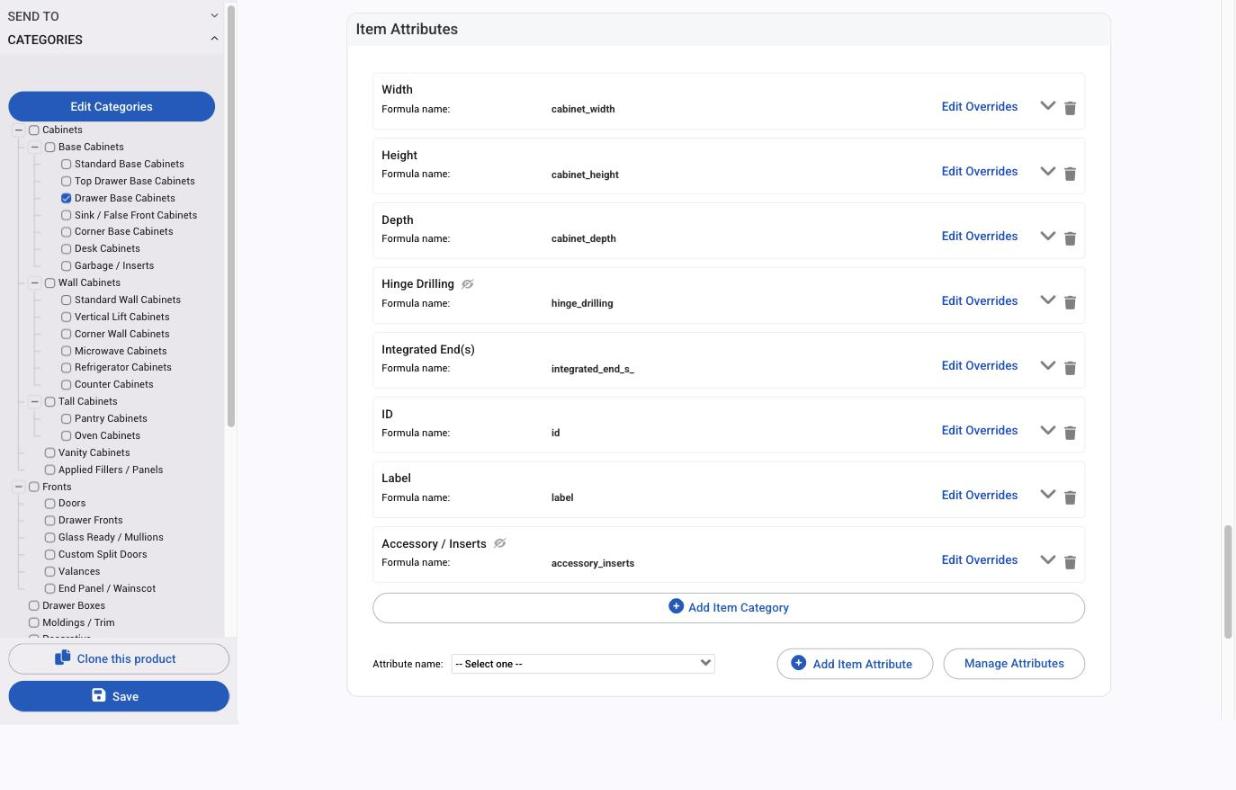
- Open the product at Settings > E-Commerce > Products and stay on the Attributes tab.
- Under Group Attributes click Add Group Attribute, or under Item Attributes click Add Item Attribute. Group attributes are answered once for the whole group and need Sell in groups on; item attributes are answered per item. See How attributes work.
- Choose the attribute in the Attribute name dropdown first, then click the add button. Manage Attributes opens the attribute list if the one you need doesn't exist yet.
- Save.
The attribute appears with its formula name and an Edit Overrides link for changes that apply to this product only.
Put attributes in order
Hover over an attribute's name until the move cursor appears, then drag it up or down the list. The order here is the order on the order page. Save when you're done.
To reorder the options inside a dropdown, open the attribute itself and drag the rows of the options table.
Group attributes under a heading
Long attribute lists are easier to use when related fields sit under a heading the customer can open and close.
- Click Add Group Category (for group attributes) or Add Item Category (for item attributes).
- Name the category, for example "Box construction" or "Drawer options".
- Tick the box next to the name if the category should start collapsed on the order page.
- Drag the attributes you want under the heading.
- Save.
Remove an attribute from a product
Click the delete icon next to the attribute on the product and save. The attribute itself stays in your list for other products. Formulas on this product that used it will fail their check, so update the pricing and parts tabs afterwards.
Things to know
- Layout on the order page comes from each attribute's Formatting Settings (width, padding, starts a new row). To fit more on a line, reduce the attributes' Order Page Width. See Attribute settings: reference.
- Customers see the categories as collapsible sections with the names you gave them.
- A crossed-out eye icon next to an attribute's name means it is hidden on the order page, either on the attribute or by an override on this product.
- The Attributes tab is the product's main form. Saving it saves the product's settings and categories as well.