
Getting your product catalog organized isn't just about aesthetics — it directly impacts how easy it is for your customers to find and order the right products. Allmoxy gives you several tools to control how products are grouped, ordered, and displayed both on the Order Page and on your output pages.
- Categories
- Priority Sort
- Output Page Part Sorting
Organizing Your Catalog with Categories and Subcategories
The first step to a well-sorted catalog is using the Category and Product Tree to break your products into logical groups. Think of categories as the chapters of your catalog — they help customers navigate to what they need without scrolling through everything at once.
For example, a door catalog might be broken into categories like:
- Doors
- Subcategory: Slab Doors, Raised Panel Doors, Mitered Doors
- End Panels
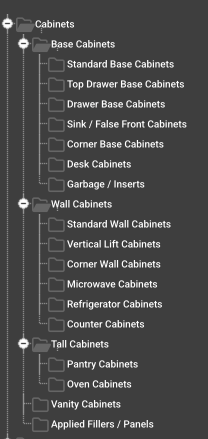
A cabinet catalog might be organized by type (Base Cabinets, Wall Cabinets, Tall Cabinets) or by use case (Kitchen Cabinets, Vanities, Garage Cabinets). There's no single right answer — choose whatever structure makes the most sense for how your customers think about your products.
To create categories: navigate to ⚙️ ➡️ Categories and select Add Category. Categories can also have subcategories, which is handy if one of your top-level categories gets large enough to need its own internal structure. When nesting a category, upon up the "child" category and use the Child Of setting to select the desired higher category. In our Door example above, we'd create the Raised Panel Doors category, then select Doors in the dropdown for the Child Of setting.
One more useful feature: a single product can be assigned to multiple categories. So if you have a product that belongs in both "Base Cabinets" and "Vanities," you don't need to duplicate it — just assign it to both.
Controlling Product Order with Priority Sort
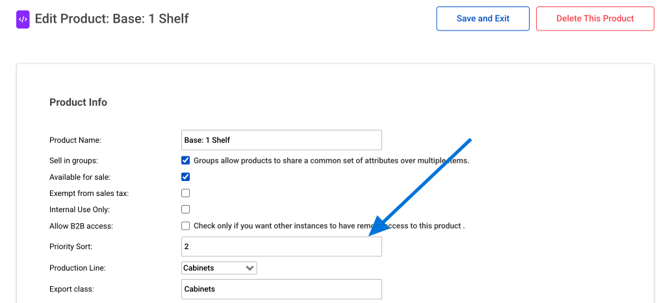
Once your categories are set up, you can control the exact order that products appear within each category using the Priority Sort setting. You'll find this on each product's editor page.
Priority Sort uses a numeric value — a product with a Priority Sort of 1 will appear first in its category on the Order Page, a value of 2 second, and so on. This is great for surfacing your most popular or most important products at the top of each section.
Setting Your Order Page Column Layout
Once your products are sorted within their categories, you can control how many products appear in a row before wrapping to the next row. Navigate to ⚙️ ➡️ Theme and look for the setting called "Order Page Columns." Most companies find 4–6 columns to be the sweet spot, but you can adjust it to match your catalog's density and your customers' screen sizes.
Sorting Products on Output Pages
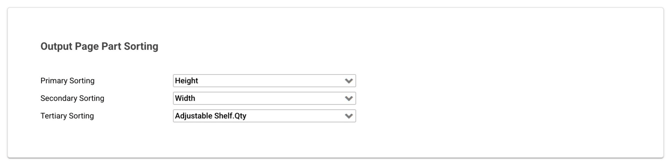
Beyond the Order Page, you can also control how products from an order are sorted on your output pages (cut lists, labels, production sheets, etc.). This is managed through the Output Page Part Sorting setting.
Part Sorting lets you define a multi-level sort order for how multiple instances of the same product are arranged. You can sort by both attributes and by parts. For example, on a 5-piece door output page, you might want to sort by:
- Largest height first
- Then by widest width
- Then by adjustable shelf quantity
This kind of sorting can make a real difference in production efficiency — your shop floor team sees parts in a logical sequence rather than in the order they happened to be entered.
Quick Reference: Sorting Settings at a Glance
| What You Want to Control | Where to Find It |
|---|---|
| Number of product columns on Order Page | ⚙️ ➡️ Categories⚙️ ➡️ Theme ➡️ Order Page Columns |
| Grouping products into categories | ⚙️ ➡️ Categories |
| Product order within a category | ⚙️ ➡️ Products ➡️ Attributes tab on a product |
| Part order on output pages | ⚙️ ➡️ Products ➡️ Attributes tab on a product |
That covers the main tools for product sorting in Allmoxy. Used together, these settings give you full control over how your catalog is experienced — from the moment a customer lands on your Order Page until you drop a cut list on the shop floor.