
Allmoxy keeps two clocks for your team. The time card is the work day: employees clock in when the shift starts and out when it ends, and you pay them for that time. Job time is the shop clock: employees clock onto a specific order and labor process, so you can see which jobs are profitable and which steps take longest. You can use either one, or both together.
Applies to: shops tracking attendance, payroll hours or labor on jobs. Wages need the View/Modify Private Data permission; pay settings live under Settings (gear) > Financial.
In this article
- Time card or job time?
- 1. Add each employee's wage
- 2. Set the pay period and payroll tax
- 3. Set up labor processes (for job time)
- 4. Equip the shop floor
- Things to know
Time card or job time?
| Time card | Job time | |
|---|---|---|
| Answers | How long was each person at work? | How long did each order and step take? |
| Employees use | Clock In on their Home page, or the timecard scanner | The Time Tracking dialog, or a scanning station |
| Feeds | Pay in the Employee Timecards report | Time Tracking, Process Details, Work Summary and Order Results Comparison reports |
| Needs | An hourly wage or weekly salary on the employee | Labor processes set up |
The time card replicates the clock on the wall: you pay people for being there, breaks and all. Job time is where the rich data comes from. Track the things you will actually measure.
1. Add each employee's wage
Open the employee (Contacts, then the person, then Edit) and fill in Employee Information:
- Hourly Wage, or
- Weekly Salary.
One of the two is required before the employee's Clock In button works; without it the button is grayed out. If both are filled in, the weekly salary is used for pay and the hourly wage for costing labor on itemized orders. The wage is also what prices clocked job time on the order's Results tab.
2. Set the pay period and payroll tax
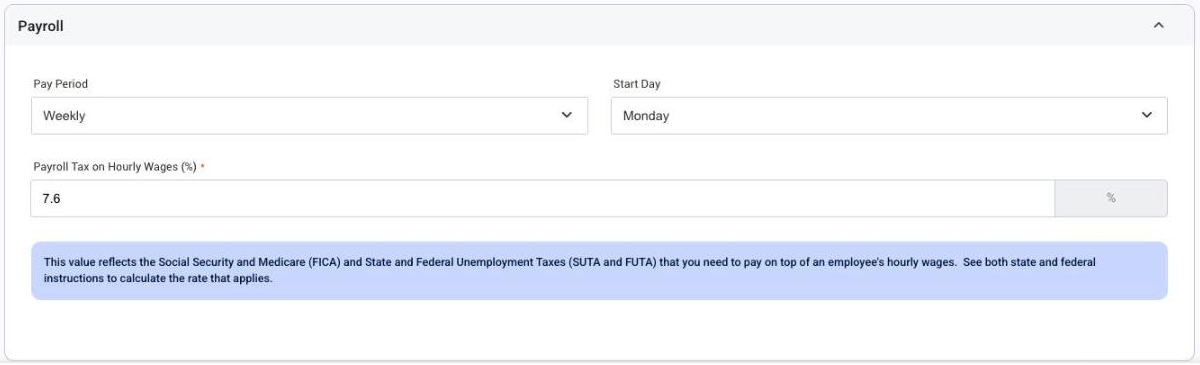
Go to Settings (gear) > Financial and find Payroll.
- Pay Period: Weekly, Bi-Weekly, Semi-monthly or Monthly.
- Start Day: the day the period starts. Bi-weekly also asks which week; semi-monthly asks for two start days in the month; monthly asks for one.
- Payroll Tax on Hourly Wages (%): your employer share of FICA, SUTA and FUTA, added on top of hourly wages when labor is costed on itemized and project orders.
The pay period sets the day strip employees see on their time card.
3. Set up labor processes (for job time)
Job time needs something to clock against. Create your production lines and their labor processes first; see Set up production lines and labor processes. Each line has its own processes, so a shop with a fronts line and a boxes line will usually have slightly different steps in each. Then employees click their avatar and choose Time Tracking, pick the order and the process, and clock in; when typing the order number, the list can take a moment to find it. See Track job time.
4. Equip the shop floor
Once the system is running you will want a computer at each station or machine. As a rule of thumb, nobody should walk more than 10 seconds to clock in. Inexpensive laptops or tablets strapped to the machines work well, and a barcode scanner (Code 128) at each one lets the team scan the barcode on the output page instead of typing order numbers.
For the work day, one computer near the door running the Timecard Scanner lets employees clock in and out with a badge; see Use the timecard scanner and badges.
Things to know
- Clocking out of the work day also closes any job clocks the employee left running.
- Deactivating an employee closes their open shift and job clocks.
- Payroll itself is run in your payroll provider. Allmoxy gives you the hours and pay to enter there; see Manage time cards and the payroll report.
Watch: Time cards and time tracking (older screens)