
Add a product at Settings > E-Commerce > Products > Add Product. Fill in Product Info, attach the attributes customers will answer, tick its categories, save, and then build its parts and pricing on the other tabs.
Applies to: every shop. You need the Manage Catalog permission. Cloning an existing product is often faster than starting blank; see Copy, bulk-edit, import and export products.
In this article
Add the product
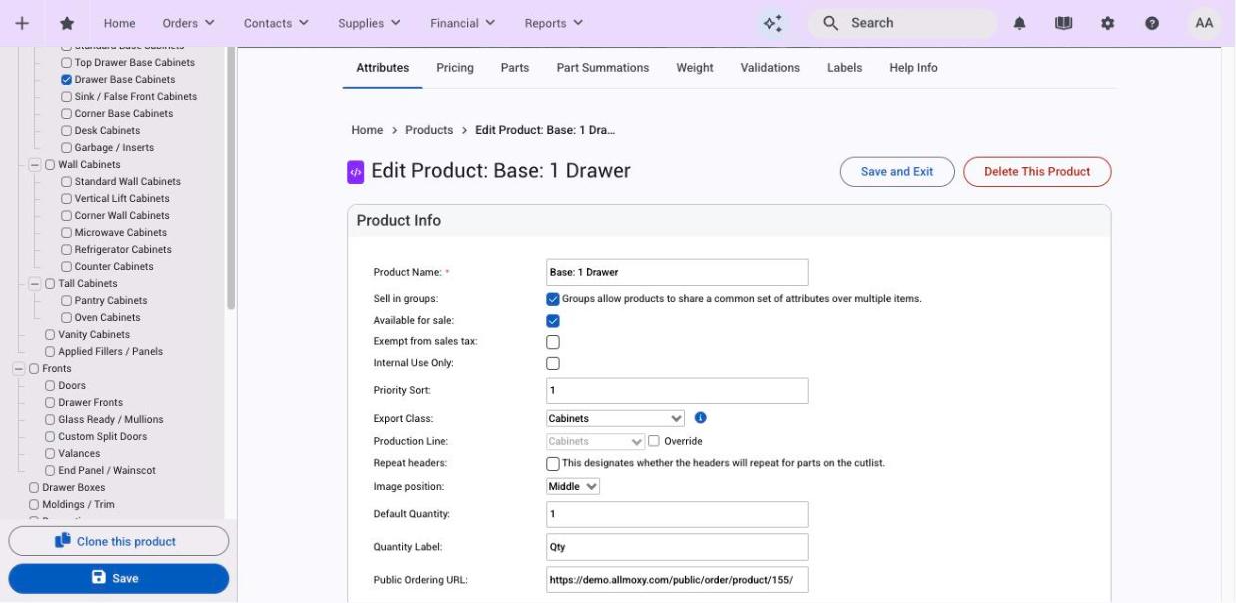
- Go to Settings > E-Commerce > Products and click Add Product.
- Enter the Product Name. Customers see this name, so use the words they use.
- Untick Available for sale if you want to finish the product before customers can see it. You can tick it later.
- Tick Sell in groups if customers will order several of this item with shared settings, such as ten doors in the same wood and finish.
- Choose the Export Class so sales of this product land in the right accounting bucket, and the Production Line if your shop uses them.
- Set Priority Sort (lower numbers show first in a category), Default Quantity and Quantity Label.
- In the Categories sidebar, tick each category the product belongs in.
- Click Save.
Every field is explained in Product settings: reference.
Attach attributes
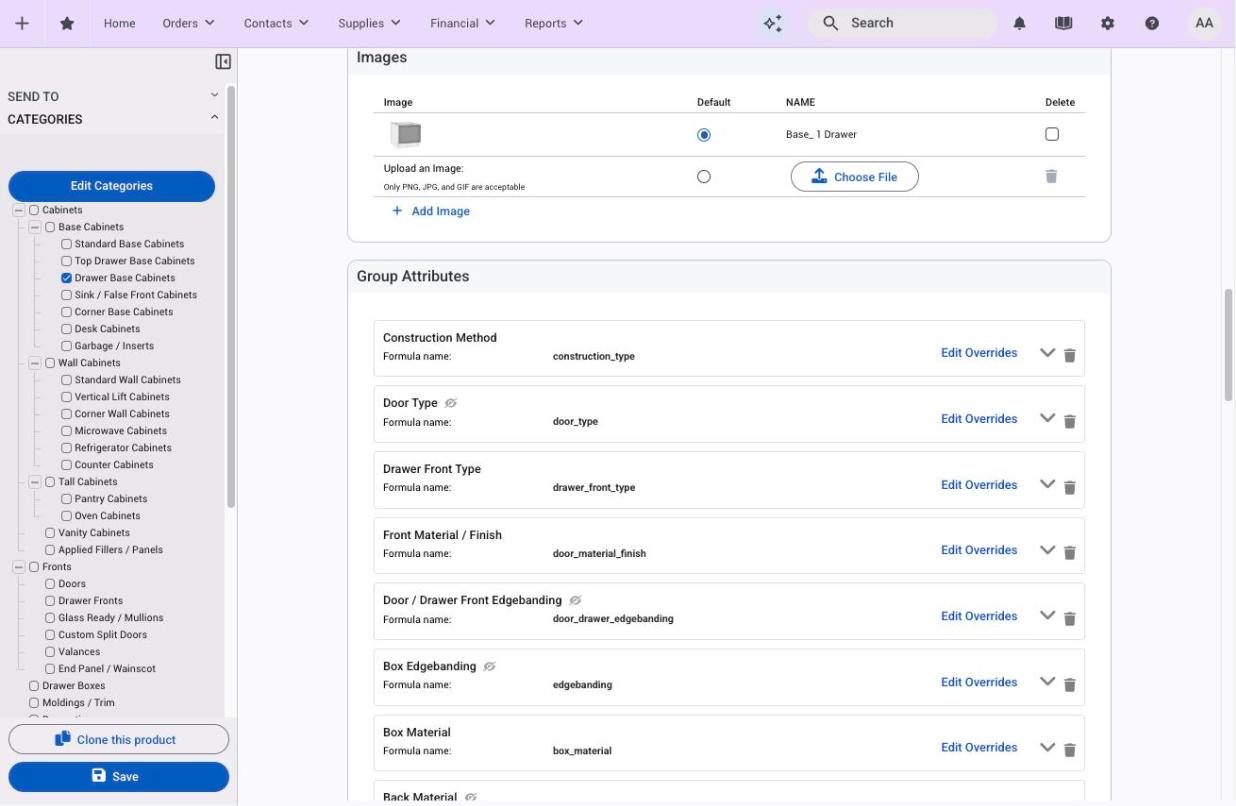
Attributes are the questions on the order page. On the Attributes tab (the product's main page):
- Group Attributes are answered once for a whole group of items, such as wood type. They only apply when Sell in groups is on.
- Item Attributes are answered for each item, such as width and height.
Click Add Item Attribute (or the group equivalent), pick an attribute from your list, and save. To create a new attribute, use Manage Attributes or go to Settings > E-Commerce > Product Attributes. Any attribute can be changed for this product only with Edit Overrides next to it.
Learn more: How attributes work.
Choose who can see it
Under Company Exclusive:
- None: every customer sees it.
- Single Company: one customer company sees it.
- Use Tags: companies carrying one of the chosen tags see it.
Tick Internal Use Only instead if customers should never see it but your team needs to add it to orders. See Internal use products.
What comes next
The product isn't ready to sell until the other tabs are filled in. Each tab is its own form, so save before you move on.
- Pricing: the formula that turns the customer's answers into a price. See How Allmoxy prices a product.
- Parts: what the product is made of, for cut lists, labels and exports. See Parts: how a product is calculated.
- Validations: rules that warn the customer or stop the order. See Product validations.
- Weight, Part Summations, Labels and Help Info as you need them.
When everything checks out, tick Available for sale and save.
Things to know
- Test it as a customer would. Open the order page, choose a customer (or your own company if the product is exclusive to you), add the product and check the price and any validations.
- Pricing and weight won't save with a broken formula. The error shows on the tab. Parts save and then show their errors, so reopen the Parts tab after saving.
- Images go on the Attributes tab under Images. Square images work best; see Product images.
- Very large products can hit a size limit on save ("Too much data was uploaded"). If you see it, contact support.