
Change the status in the order's sidebar and save, or let your shop-floor tools do it: Start Job on the Work Schedule, clocking a labor process, scanning, a batch, or the ship button on the Shipping report. You can also have newly placed orders verify themselves.
Applies to: catalog and itemized orders, for your team. Changing an order at Verified or later needs Edit Verified Orders. For project orders, see Move a project order through its statuses.
In this article
- Before you start
- Change it on the order
- Verify a new order
- Turn on auto-verify
- Start a job from the Work Schedule
- Clock processes or scan
- Mark orders shipped
- Move many orders at once
- Move an order back
- Put an order on hold or void it
- See an order's status history
Before you start
Once an order is verified, you've said it's good to build as it is. Keep Edit Verified Orders to the few people who need it: changes after Verified affect what's on the floor, what's been invoiced and what flows to your accounting. Without it, an order at Verified or later is read-only and can't be moved back past Ordered.
Change it on the order
- Open the order.
- In Order Info, pick the new status.
- Save the order.
You can pick any status. Moving forward passes through every status in between and runs each one's automations.
Verify a new order
Verifying is your review before production: are the selections, ship date and ship method realistic?
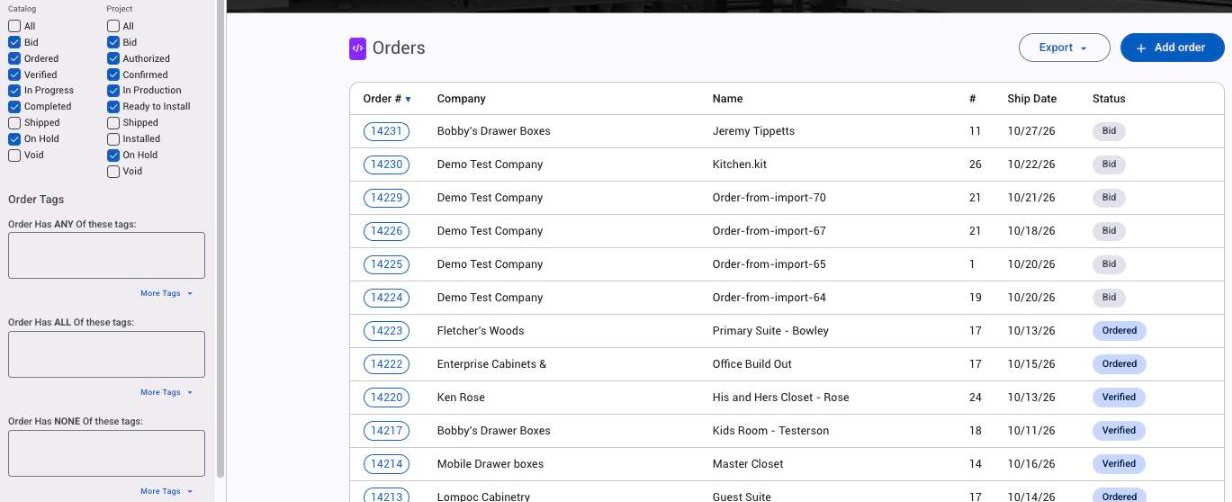
- Go to Orders > Orders and filter the status to Ordered to see what's waiting.
- Open an order and check the ship date, the shipping method, the address, and whether you can build it by then. The Projection report shows what's already due that day; see Set ship dates, lead times and the production schedule.
- Change the status to Verified and save. The order is now read-only for your customer.
Turn on auto-verify
Auto-verify sends a newly placed order straight to Verified when your customer clicks Submit Order, so they get a read-only view right away. It suits you when:
- You want to stop customers from changing orders after they submit.
- Your catalog doesn't need a manual review, so the verify step is one you can drop.
- Your customers pay before processing, and you don't want changes after a payment.
To turn it on:
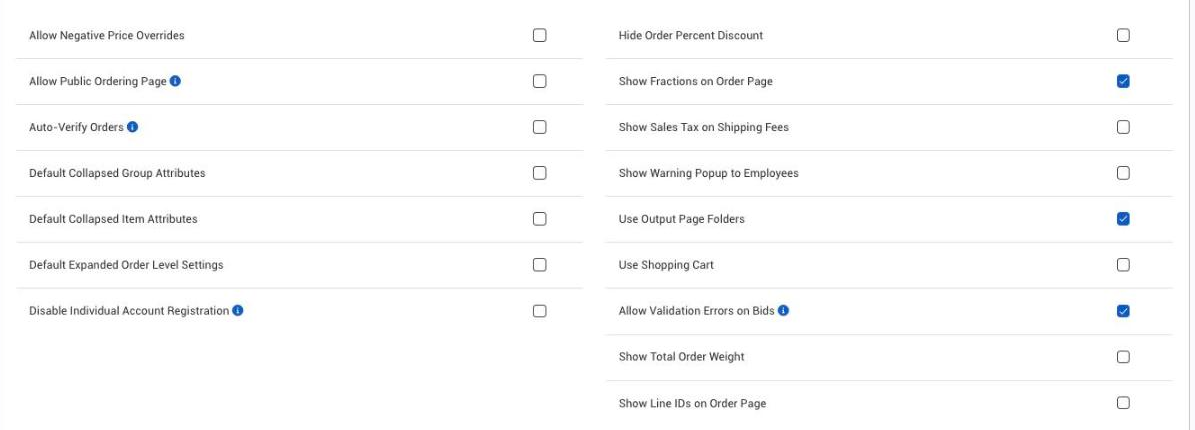
- Go to Settings > E-commerce > Order Settings.
- Tick Auto-Verify Orders.
- Click Save Changes.
Customers will need to contact you for any change once their order is verified, so make sure they know how. Auto-verify applies to catalog and itemized orders; project orders ignore it. The automations for both Ordered and Verified still run.
Start a job from the Work Schedule
- Go to Reports > Production > Work Schedule and pick a production line.
- Verified orders are listed by delivery date, each with a Start By Date.
- Click Start Job. The order (or just that production line) moves to In Progress, and its output pages open for the crew.
Clock processes or scan
Each process category can be linked to an order status. When someone clocks a process in that category, the order moves to that status. Link your last step, such as sanding or packing, to Completed, and orders complete themselves as the work is clocked.
A scanning station does the same from the barcode on your output pages, and its Shipped action marks an order shipped. Good scanning points are quality checks, assembly and finishing. See Track job time with the Time Tracking dialog and the scanning station.
Mark orders shipped
- Go to Reports > Production > Shipping. By default it shows orders that are Verified, In Progress, Completed or Shipped.
- Click the truck button on the order's row and confirm.
See Find an Order on the Shipping Report.
Move many orders at once
A batch can update a labor process for a whole group of orders, which moves them all to the status that process is linked to. See Batch orders: export, print and update many at once.
Move an order back
- Go to Orders > Orders. Shipped and voided orders are hidden by default, so tick Shipped in the status filter or search for the order number.
- Open the order.
- In Order Info, pick the earlier status, such as In Progress, and save.
What moving back does:
- Prices unlock again. A shipped order is locked; once it's back below Shipped, its prices, discount and shipping can change.
- Supplies stay where they are. Anything reserved, checked out or released isn't restored. Adjust inventory by hand if you need to.
- The invoice's charge date stays. Only a move all the way back to Bid clears the invoice, ship and install dates and the revenue date.
Clocking time on a shipped order can also move it out of Shipped, if the process is linked to an earlier status. The Time Tracking dialog and the scanning station warn you first.
Put an order on hold or void it
Pick On Hold or Void in Order Info and save. You can do this from any status. See Edit, duplicate, remake or cancel an order for cancelling and voiding.
See an order's status history
- Open the order.
- Open Order Info in the sidebar and click Status History.
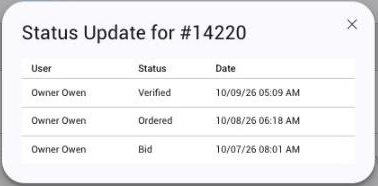
It lists every status change with the user who made it and the date and time. One save that moves an order across several statuses adds a row for each one, all at the same time. For status changes across many orders, use the Status History Report.