
Your name, your logos and your header are what make your Allmoxy site look like your shop instead of ours. The name lives on your company record; everything else is uploaded on Settings > Admin > Theme. This article walks through each one and where it shows up.
Applies to: every shop. Editing your company record needs access to your company; the Theme page needs the Edit the site settings permission.
In this article
- Change your company name
- Add your logos
- Style your login page
- Design your header
- Build your header content
- Check that it worked
- Things to know
Change your company name
Your company name shows throughout your site and on your output pages, and it's the sender name on the emails Allmoxy sends for you.
- Open your own company. From your home page, click your company name, or search for it in the search box at the top right of any page. You can also go to Contacts > Companies and open it there.
- Click Edit.
- Change the company name (and any other company info that needs it).
- Save your changes.
Add your logos
- Go to Settings > Admin > Theme.
- Scroll down to the image upload sections.
- In Site Logo, upload your logo. It appears on the login page above the username and password, and on the create new account screen. The size to use is 600 x 600 px. Make it at least 200 px wide; it scales proportionally to fit.
- In Invoice Logo, upload the logo for your printed pages. It appears on any output page that uses the logo tag (invoices, confirmations, packing slips), and you can also use it in trigger emails. The size to use is 250 x 75 px.
- Save.
Style your login page
The login page has a large left-hand panel, the Login Side Image. It's a great place to showcase your products, a finished job or a design concept, make an announcement, or show off your marketing.
- On the Theme page, scroll to Login Side Image and upload your image.
- Save, then log out (or open your site in a private window) to see it.
Image tips:
- Use an image at least 1200 px wide by 1800 px tall. A smaller image is stretched to fit and loses quality. The page is built for 2000 x 4000 px, and it won't accept an image smaller than 1000 x 1600 px.
- The image is anchored at the center. Keep text and anything important inside the safe area: 144 px in from the left and right edges and 220 px in from the top and bottom. On a 1200 x 1800 image that's a centered area 912 px wide and 1360 px tall.
- The side image shows on the full login page only. It doesn't show in the pop-up login on the public order page.
Design your header
The header on every page is two layers, one on top of the other:
- Header Background is a picture and nothing more. It has no buttons or links; it's the backdrop.
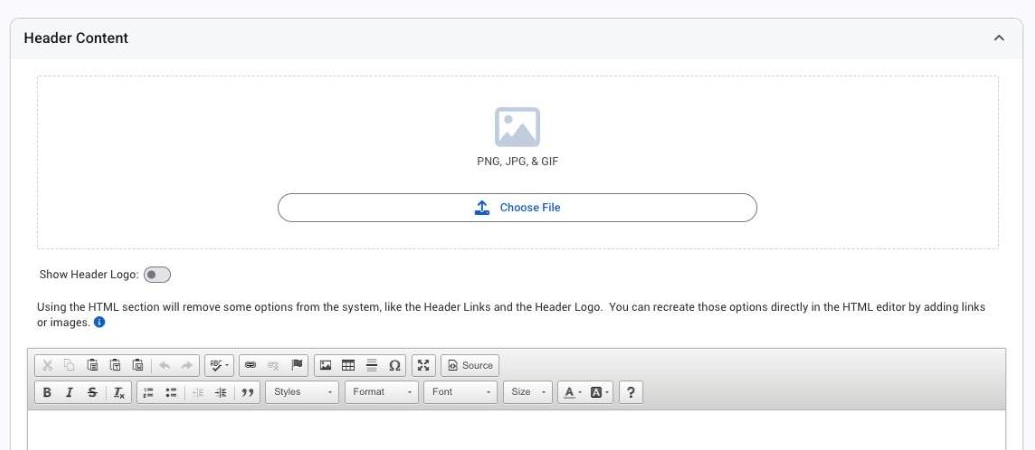
- Header Content sits on top of it. This layer can do things: it holds your header logo and anything you build in its HTML editor, such as links, a navigation menu or a line of text. Because it's HTML, you can style it like a web page so it matches your own website and the switch between the two feels seamless.
To set the background, scroll to Header Background on the Theme page, upload your image (2000 x 300 px; its height becomes the header height) and save. The background repeats as many times as it takes to fill the header area, so a small image can show seams or lines where it repeats. Use a solid color or an image that's wide enough to cover the header, or one that repeats cleanly.
To show just your logo, upload it in Header Content (250 px wide by the header height) and turn on Show Header Logo.
Build your header content
Header content doesn't repeat, so you can line it up however you like.
- Back it up first. In the Header Content editor, click Source to see the HTML, copy all of it to a text file, and keep it. If the new header doesn't turn out right, paste the saved HTML back and start over.
- Add your links and text in the editor. To line links up neatly, use the editor's table tool: make as many rows and columns as you need and put one link in each cell.
- To place your logo yourself, insert it in the header content. A custom header block takes the place of the header logo.
- Save.
If you know a little HTML and CSS, you can go further. Having someone around who does is a big help in getting the header exactly right.
Check that it worked
Log out and open your site address. You should see your site logo above the login form and your login side image beside it. Log back in and check the header at the top of any page. Print or preview an invoice to see your invoice logo.
Things to know
- There's no separate "header links" settings page. Links in the header are built in the Header Content editor. The Links each person can add for themselves are a different feature.
- Emptying the header deletes it. If you clear the Header Content editor and save, the header is gone. That's why step 1 above is a backup.
- Your company name is also your email sender name. If you rename your company, your customers see the new name on emails from Allmoxy.
- Dealers can brand their own view. With Dealer Mode on, a dealer's primary contact can set images for that dealer's users. See Dealer Mode.
- New to the words? See Allmoxy terminology.